
Using the Guided flow
Walk a report step by step: details, photos, section review, summary and publish.
Start the Guided flow
- 1Open a report.
- 2In the left-hand list, click Start guided flow.
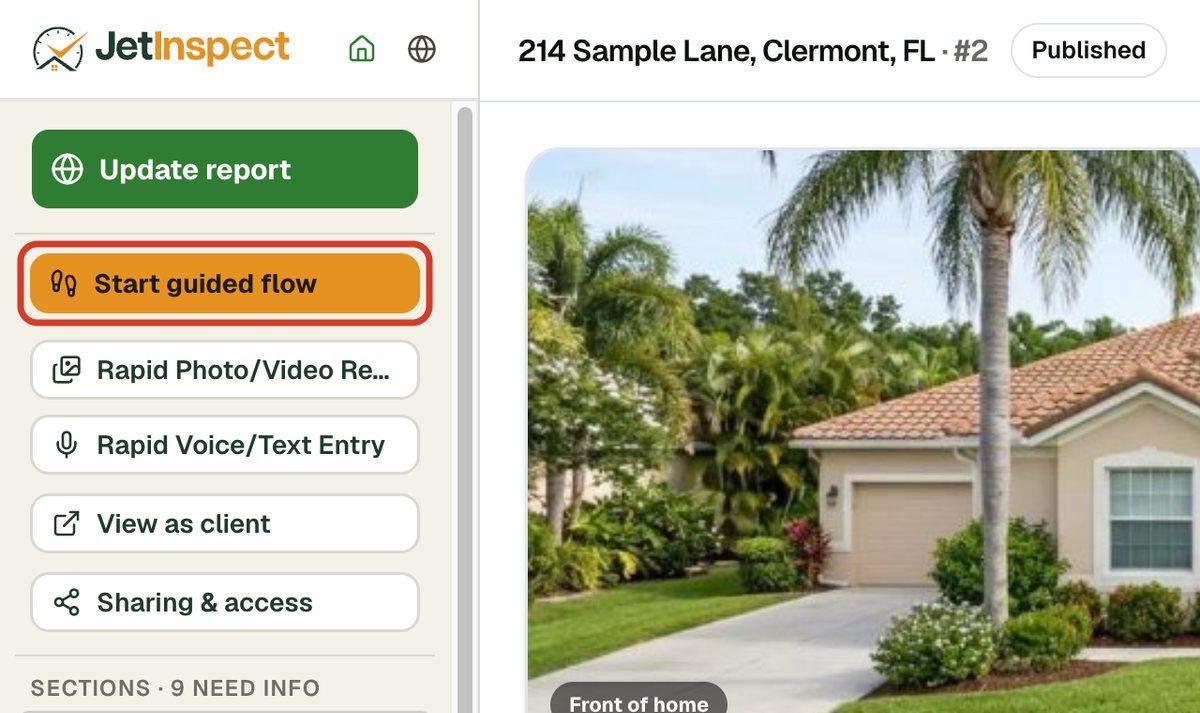
A brand-new report opens in the flow by itself.
Work down the steps
The first screen lists five steps. A check mark means a step is done. The step you are on is outlined in gold, with a Continue button. Each step picks up where you left off.
- 1Property & client details: the address, your client and the inspection date. Click Continue: Photos when you are done.
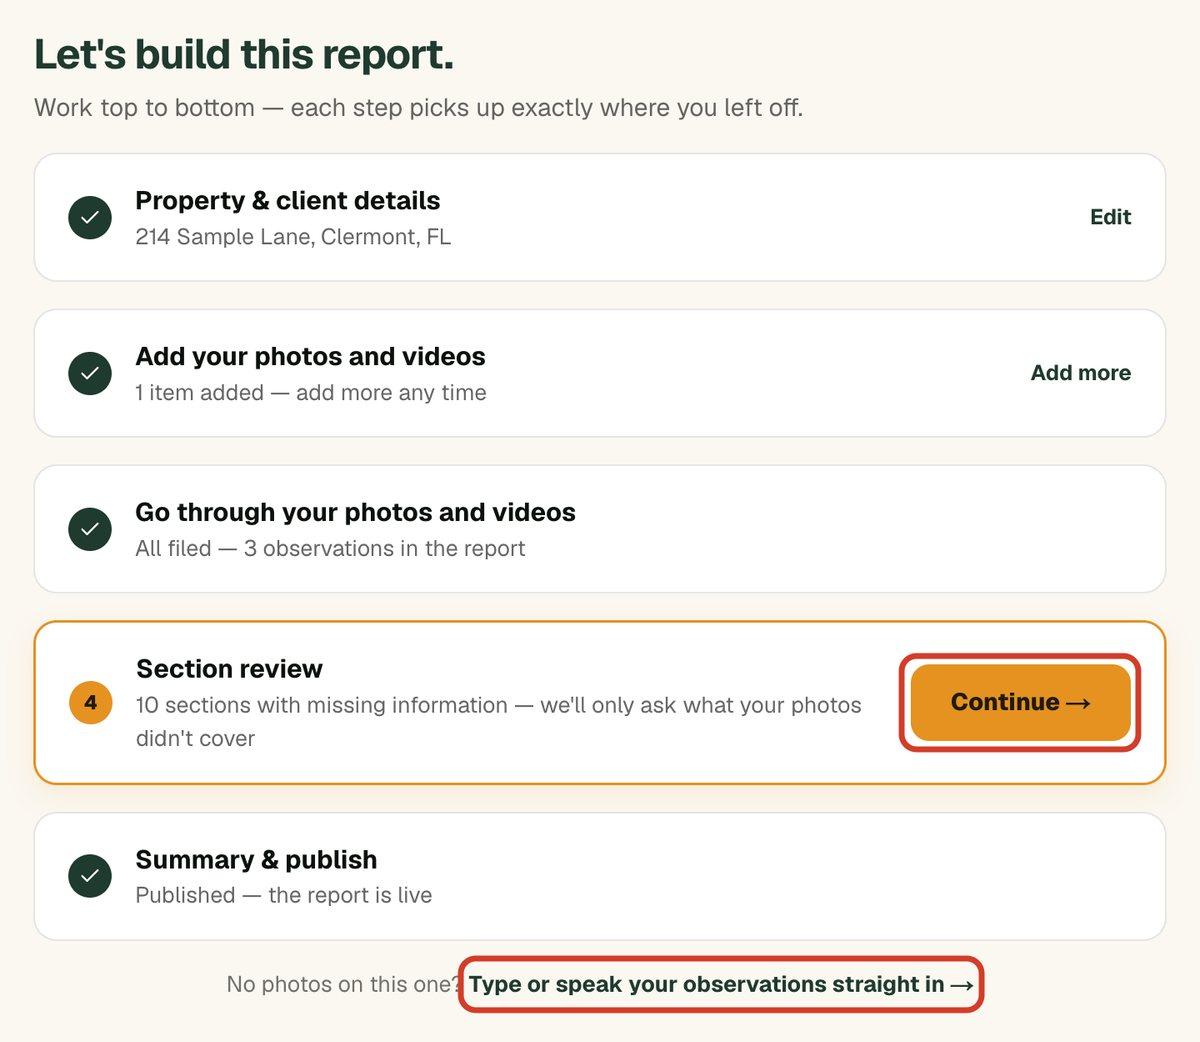
- 2Add your photos and videos: drag in everything from the inspection, or click Choose photos or video…. Click Add more later to add more.
- 3Go through your photos and videos: you see them one at a time. Talk or type what you see, and it becomes an observation in the right section. Click Skip for now to leave one for later.
- 4Section review: the flow asks only about what your photos did not cover, a section at a time. See below.
- 5Summary & publish: pick the summary paragraphs, then start your final review.
Do the section review
Each section that is missing something gets its own screen. You see its opening description, its fields and its limitations, and the observations already in it. Fill in what applies and click the Next button at the bottom (it names the next section) to move on.
- 1Write the section description, or click Choose from library. Click Leave it blank — don't ask again for this section if you do not want one.
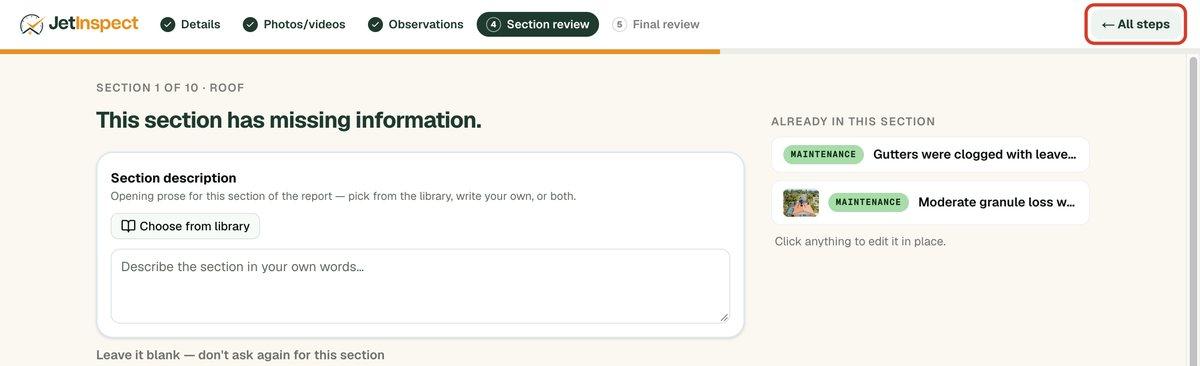
- 2Answer the section's fields, and add any limitations that applied.
- 3Did not inspect it? Click I didn't inspect this section and the flow records it as not inspected.
- 4After the last section, you can add any other observations, by voice or typing, before the summary.
The bar across the top shows Details, Photos/videos, Observations, Section review and Final review. Click ← All steps at any time to go back to the step list. Your work saves as you go.
Finish and publish
- 1On the summary screen, pick the paragraphs for your report summary and click Continue.
- 2The last screen counts what is in the report. Click Start my final review to open the full report in the section list and read it the way your client will.
- 3When it reads right, click the green Publish button at the top of the section list.
Leave the flow, or come back
At the bottom of every screen, click Prefer to work on any part yourself? Open the section list to leave the flow and work in the section list. Your progress is kept.
Reopen a report that is not finished and JetInspect asks Pick up the guided flow where you left off? It lists what is still open. Click Resume the guided flow, or click No thanks — open the editor. A report asks only once. To get back in later, click Start guided flow again. It always opens on your next open step.
No photos on this report
On the step list, click Type or speak your observations straight in. You get a box to speak or start typing, and each observation is added to the report. Use it for an inspection with no photos, or to add observations as you think of them.